Aloe Vera Plant Care in a Pot

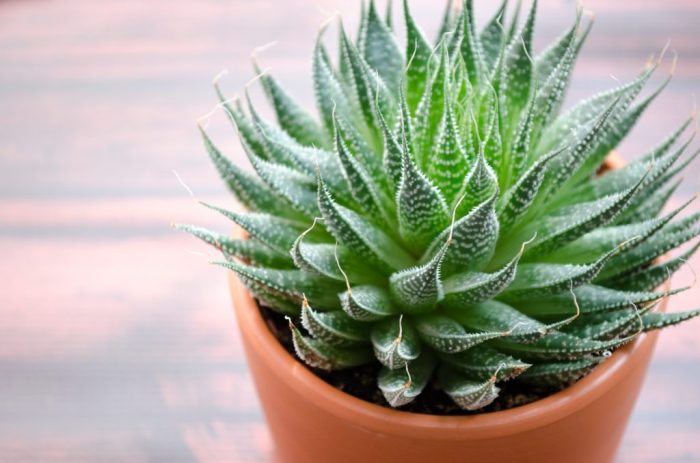
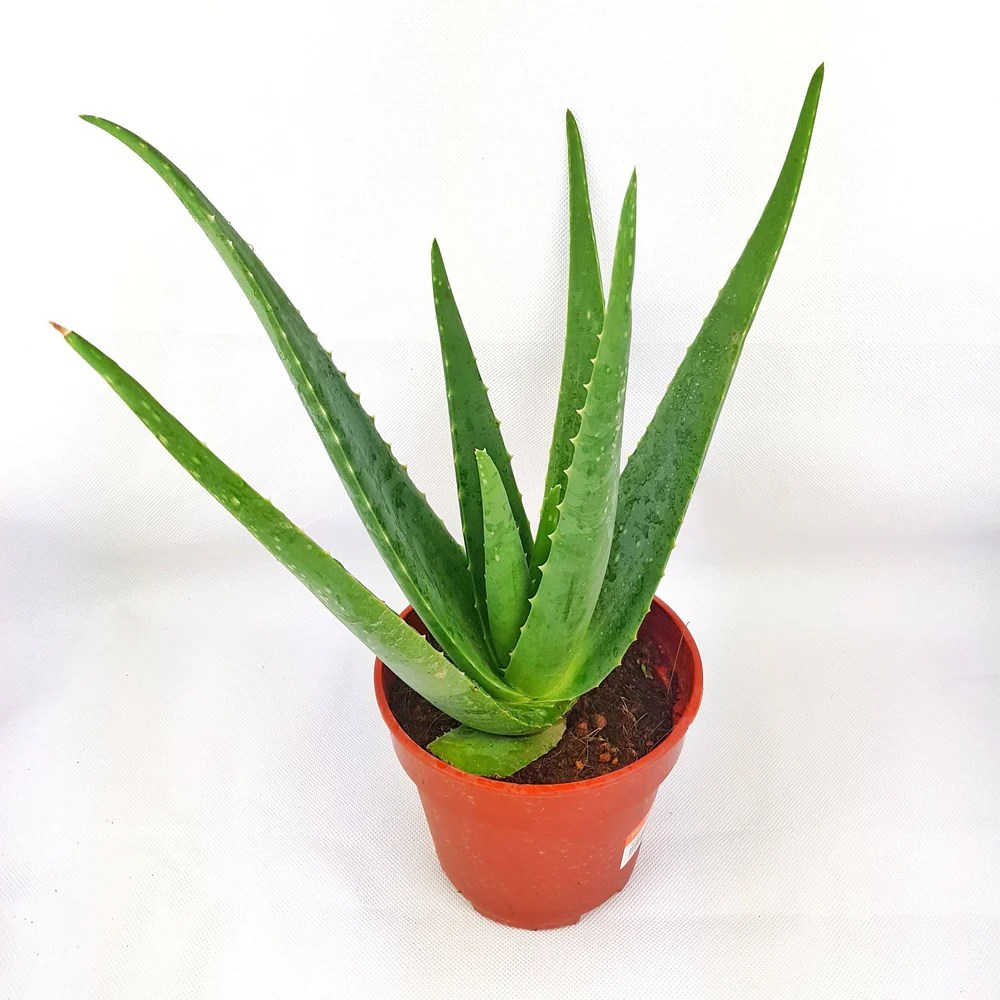
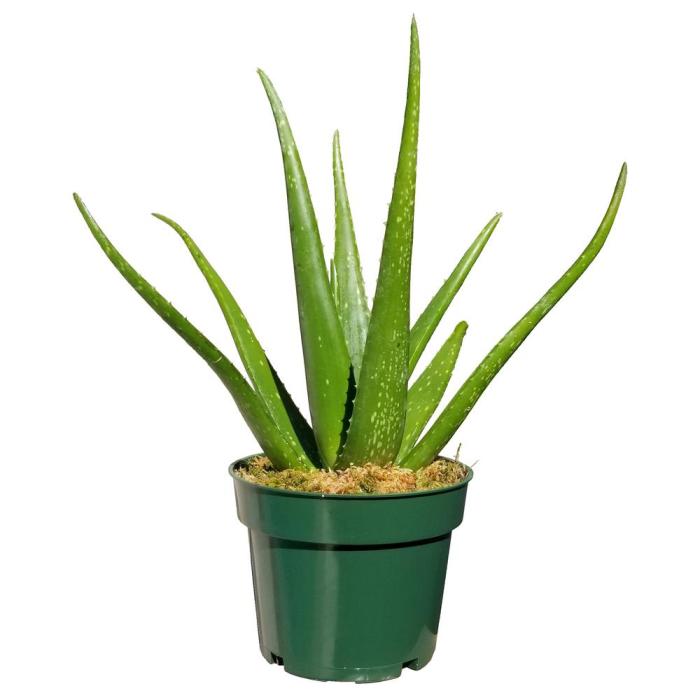
Aloe vera plant in pot – So you’ve got yourself a cool aloe vera plant, huh? It’s like having a little piece of the desert in your living room, ready to soothe those sunburns (responsibly, of course!). But keeping this spiky succulent happy requires a little more than just setting it on a shelf and forgetting about it. Think of it as your low-maintenance, high-reward celebrity houseplant.
Let’s get into the nitty-gritty of keeping your aloe vera thriving.
Ideal Pot Size and Material
Choosing the right pot is like picking the perfect outfit – it needs to fit just right. Too small, and your aloe vera will feel cramped; too big, and the soil will stay wet for too long, leading to root rot – a total plant fashion disaster. Aim for a pot that’s only slightly larger than the plant’s root ball, allowing for a little room to grow.
Terracotta pots are a popular choice because they’re porous, allowing for better air circulation and preventing soggy soil. Plastic pots are also fine, but make sure they have drainage holes to avoid that dreaded root rot. Think of it like this: your aloe vera needs to breathe, just like you after a killer workout!
Optimal Soil Composition
Aloe vera isn’t into drama – it prefers well-draining soil that’s not overly rich. Think sandy, not muddy. A good mix would be a cactus and succulent potting mix, which you can easily find at most garden centers. You could even get creative and make your own blend by combining regular potting soil with perlite or coarse sand to improve drainage.
It’s all about that perfect balance of moisture retention and aeration – no drama, just happy roots.
Optimal Sunlight Requirements
Aloe vera loves the sun, but not the kind that’ll give you a third-degree burn. Think bright, indirect sunlight for about 6-8 hours a day. A south-facing window (in the Northern Hemisphere) might be a bit too intense, so consider an east- or west-facing window instead, or a spot a few feet away from a south-facing window. Too much direct sun can scorch the leaves, giving your plant a serious case of sunburn.
Too little, and it’ll become leggy and pale, looking like it needs a serious vacation.
Repotting an Aloe Vera Plant
Repotting your aloe vera is like giving it a stylish upgrade – a new pot, a fresh start! You’ll want to repot your aloe vera when it outgrows its current pot, usually every 1-2 years. This is crucial for healthy growth.
| Step | Description | Pot Size | Soil Type |
|---|---|---|---|
| 1. Preparation | Gently remove the plant from its current pot. Loosen the roots if necessary. | Slightly larger than the root ball | Cactus and succulent potting mix |
| 2. Inspect the Roots | Check for any rotted or damaged roots. Trim them away with clean, sharp scissors. | Same as Step 1 | Same as Step 1 |
| 3. New Pot | Place a layer of fresh potting mix in the bottom of the new pot. | Same as Step 1 | Same as Step 1 |
| 4. Planting | Center the aloe vera plant in the pot and fill in around the roots with more potting mix. | Same as Step 1 | Same as Step 1 |
Watering and Fertilizing a Potted Aloe Vera Plant: Aloe Vera Plant In Pot

Okay, so you’ve got your awesome aloe vera plant, looking all sleek and succulent. But like any celebrity, it needs the right pampering to stay thriving. We’re talking proper hydration and a little bit of that good ol’ fertilizer magic. Let’s break it down, Hollywood style.
Watering and fertilizing your aloe vera are crucial steps in keeping it healthy and happy. Think of it like this: water is its daily dose of Vitamin H 2O, and fertilizer is its occasional protein shake. Get it wrong, and your plant could go from a vibrant green superstar to a wilting drama queen.
Watering Techniques for Potted Aloe Vera
Aloe vera, unlike some plants, isn’t a thirsty diva. It prefers a “less is more” approach to watering. Overwatering is a major no-no, potentially leading to root rot – the ultimate plant apocalypse. During the warmer months (spring and summer), water thoroughly only when the soil is completely dry, usually about every 2-3 weeks. Feel the soil; if it’s dry an inch or two below the surface, it’s watering time.
In the cooler months (fall and winter), cut back even further, maybe watering only once a month or even less, depending on your climate and how dry the soil is. Remember, it’s better to underwater than overwater. Think of it as a desert plant – it’s used to tough conditions! In humid climates, you’ll need to water less frequently than in drier climates.
Signs of Underwatered and Overwatered Aloe Vera
Underwatering? Your aloe will show you. Leaves will start to wrinkle and shrivel up like a sad raisin, becoming soft and potentially changing color to a dull, faded green. It’s basically calling for help! Overwatering, on the other hand, is a whole different kind of drama. You’ll see mushy, yellowing leaves, potentially with dark spots appearing, and the base of the plant might feel soft.
In extreme cases, you’ll see black or brown rot setting in at the base – a total plant meltdown.
Fertilizing Schedule for Potted Aloe Vera
Think of fertilizer as a little pick-me-up, not a daily feast. Aloe vera doesn’t need a lot of fertilizer, so keep it low-key. Use a balanced, water-soluble fertilizer diluted to half strength. During the growing season (spring and summer), fertilize every 2-4 weeks. During the dormant season (fall and winter), you can cut back or skip fertilizing altogether.
Using too much fertilizer can lead to fertilizer burn, causing brown tips and leaf damage. Think of it like giving a human too many energy drinks – it’s not pretty.
Choosing the right fertilizer is also important. A balanced, slow-release fertilizer formulated for succulents or cacti works best. Avoid fertilizers high in nitrogen, as this can encourage soft, leggy growth, which isn’t ideal for an aloe vera.
Consequences of Improper Watering and Fertilizing
Getting the watering and fertilizing balance wrong can have some serious consequences for your aloe vera. It’s like a delicate dance; get it wrong, and your plant might not be happy.
- Root rot: Overwatering leads to soggy soil, suffocating the roots and causing decay.
- Leaf discoloration: Both under- and overwatering can cause yellowing, browning, or mushiness in the leaves.
- Stunted growth: Insufficient watering and fertilization will prevent your aloe from reaching its full potential.
- Pest infestations: Weak plants are more susceptible to pests and diseases.
- Plant death: Severe cases of improper care can lead to the demise of your beloved aloe vera.
Common Problems and Solutions for Potted Aloe Vera Plants
Okay, so you’ve got your awesome aloe vera plant chilling in its pot, looking like a total plant-rockstar. But even the coolest plants can hit a few snags. Let’s talk about some common issues and how to totally nail the whole “aloe vera care” thing. Think of this as your plant’s ultimate survival guide.
Common Pests and Diseases Affecting Potted Aloe Vera Plants
Aloe vera, despite its tough exterior, isn’t immune to pests and diseases. Early detection and swift action are key to keeping your plant thriving. Ignoring problems is like ignoring a flashing warning light on your dashboard – it’ll eventually lead to a bigger headache.Mealybugs, aphids, and spider mites are common culprits. Mealybugs look like tiny, fluffy white cotton balls, usually clustering at the base of leaves or in crevices.
Aphids are small, soft-bodied insects that suck plant sap, leaving behind sticky honeydew. Spider mites are microscopic, but their presence is betrayed by fine webbing and stippling on leaves. These pests can weaken your plant, leading to stunted growth and even death. Fungal diseases, like root rot, can also cause serious damage. Root rot often manifests as mushy, dark roots and wilting foliage, usually due to overwatering.
Preventing and Treating Common Aloe Vera Plant Diseases
Prevention is always better than cure, right? Like with any relationship, a little TLC goes a long way. Proper watering techniques are essential – let the soil dry out between waterings to prevent root rot. Providing well-draining soil and a pot with drainage holes are crucial. Good air circulation around your plant also helps prevent fungal issues.If you spot pests, don’t panic! For mild infestations, you can try gently wiping the leaves with a cotton swab dipped in rubbing alcohol.
For more severe infestations, insecticidal soap or neem oil are effective, eco-friendly options. Always follow the product instructions carefully. For fungal diseases, you might need a fungicide, but again, read those instructions thoroughly. In severe cases of root rot, repotting in fresh, dry soil may be necessary. Sometimes, it’s a case of “tough love” and pruning away affected areas to save the rest of the plant.
Having an aloe vera plant in a pot brightens any space! Proper care includes preventing waterlogging, and that’s where using a saucer for plant pots, like the ones you can find at saucer for plant pots , becomes essential. These handy saucers catch excess water, keeping your aloe vera’s roots healthy and happy. This simple addition ensures your aloe vera thrives.
Dealing with Root Rot, Leaf Discoloration, and Stunted Growth
Root rot, as mentioned earlier, is a major villain. It’s caused by overwatering, leading to soggy soil and suffocated roots. Leaf discoloration can signal various problems, including sunburn (from too much direct sunlight), nutrient deficiencies, or pest infestations. Stunted growth often points to improper watering, insufficient sunlight, or a lack of nutrients.Think of your aloe vera plant like a celebrity – it needs the right environment, the right diet, and the right amount of attention to shine.
Addressing these issues promptly is vital for your plant’s well-being. Repotting in fresh, well-draining soil can often revitalize a struggling plant.
Troubleshooting Guide for Potted Aloe Vera Plants, Aloe vera plant in pot
| Problem | Cause | Solution | Prevention |
|---|---|---|---|
| Root Rot | Overwatering, poor drainage | Repot in fresh, well-draining soil; prune affected roots | Allow soil to dry between waterings; use well-draining pot and soil |
| Leaf Discoloration (Yellowing) | Overwatering, nutrient deficiency, sunburn | Adjust watering; fertilize with balanced cactus/succulent fertilizer; provide shade from intense sun | Water appropriately; use well-draining soil; provide filtered sunlight |
| Stunted Growth | Lack of sunlight, nutrient deficiency, pests | Provide more sunlight; fertilize; treat any pest infestations | Ensure adequate sunlight; fertilize regularly; inspect for pests |
| Pest Infestation (Mealybugs, Aphids) | Infestation of pests | Wipe leaves with rubbing alcohol; use insecticidal soap or neem oil | Regular inspection; good air circulation |
Propagation of Aloe Vera from a Potted Plant

So, you’ve got a thriving aloe vera plant and you’re ready to share the love (and the soothing gel)? Propagating aloe vera is easier than you think, and it’s like getting a VIP backstage pass to the world of plant parenthood. It’s a total plant-power move! Let’s dive into the juicy details of multiplying your aloe vera army.
There are a couple of main ways to propagate aloe vera: using offsets (also known as pups) or leaf cuttings. Each method has its own vibe, its own set of pros and cons – kind of like choosing between a classic rock concert and a trendy EDM festival. Both are awesome, but offer different experiences.
Propagation Using Offsets
Offsets are baby aloe vera plants that sprout from the base of the mother plant. They’re basically mini-mes, ready to strike out on their own. Think of them as the ultimate aloe vera clones, genetically identical to their parent. This method is generally considered the easiest and most successful for home propagation. It’s like getting a freebie with your purchase! It’s a low-effort, high-reward situation.
- Identify Mature Offsets: Look for offsets that are at least 3-4 inches tall and have developed a few of their own roots. They should be sizable enough to handle transplanting without too much stress. Think of it like waiting for your kid to be old enough to move out of the house – they need to be self-sufficient.
- Gently Separate the Offset: Carefully remove the offset from the mother plant. You can usually gently twist and pull it away, but if it’s stubbornly attached, use a clean, sharp knife to separate it. Make sure you get a good chunk of roots with the offset. Think of it like a delicate surgery, you need precision!
- Allow to Callus: Let the separated offset sit in a dry, shaded area for a few days to allow the cut end to callus over. This helps prevent rot. It’s like letting a wound scab over before you mess with it. This step is crucial!
- Plant the Offset: Plant the offset in a well-draining potting mix specifically formulated for succulents or cacti. Don’t bury it too deep; the base should be just slightly below the soil surface. Think of it as Goldilocks and the Three Bears – not too deep, not too shallow, just right!
- Water Sparingly: Water the newly planted offset sparingly, allowing the soil to dry out slightly between waterings. Overwatering is a major no-no. Think of it like giving your plant a sip of water, not a bath.
Propagation Using Leaf Cuttings
While using offsets is generally preferred for ease and success, you can also propagate aloe vera from leaf cuttings. However, this method is less reliable and has a lower success rate than using offsets. Think of it as the “hard mode” of aloe vera propagation. It requires more patience and a bit more know-how.
Leaf cuttings are less successful because the aloe vera plant doesn’t naturally propagate from its leaves. The success rate is lower because the leaf lacks the necessary structures to develop roots and survive. This method often leads to leaf rot.
Comparing Propagation Methods
Choosing the right propagation method is like picking the perfect song for your road trip playlist – it depends on your preferences and the resources you have available. Here’s a quick rundown of the pros and cons of each method:
| Method | Success Rate | Challenges |
|---|---|---|
| Offsets | High | Requires mature offsets |
| Leaf Cuttings | Low | High risk of rot, lower chance of success |
Aloe Vera Plant Aesthetics and Display
Let’s get real, folks – even the most practical plant needs a little style! Aloe vera, with its striking architectural form and soothing vibes, deserves a display that showcases its beauty and complements your home decor. Think of it as the ultimate chill plant, ready to add a touch of zen to any space. We’re talking about elevating your aloe vera from “just a plant” to a bona fide interior design statement.
Three Aesthetically Pleasing Aloe Vera Displays
Choosing the right display for your aloe vera can seriously amp up its cool factor. The right pot, setting, and overall vibe can transform this succulent from a basic houseplant to a showstopper. Consider these three options, each offering a unique aesthetic.
Display Option 1: Modern Minimalist
Imagine a sleek, white ceramic pot, perhaps cylindrical or geometric in shape, holding a healthy aloe vera plant. This pot sits on a simple, minimalist wooden shelf against a crisp white wall, possibly alongside other succulents or cacti in similar pots. The overall effect is clean, modern, and effortlessly stylish. The plant’s architectural lines complement the sharp angles of the pot and the surrounding décor, creating a sense of calm and order.
The subtle green of the aloe vera provides a refreshing contrast against the neutral backdrop.
Display Option 2: Bohemian Chic
For a bohemian vibe, picture a terracotta pot, slightly rustic and uneven in texture, cradling your aloe vera. This pot rests on a woven macrame hanger, suspended from a wooden beam or a hook on the wall. Surrounding the plant could be other plants, maybe some trailing pothos or a vibrant spider plant, creating a lush, slightly wild, and very Instagrammable display.
The earthy tones of the pot and the natural materials of the hanger blend beautifully with the aloe vera’s natural form, evoking a sense of relaxed sophistication.
Display Option 3: Rustic Farmhouse
Picture this: a galvanized metal pot, perhaps slightly distressed for a vintage look, containing your aloe vera. This pot sits on a weathered wooden windowsill, possibly in a sun-drenched kitchen or bathroom. Surrounding the plant might be some vintage kitchenware or other rustic accents, like a mason jar or a chipped enamel mug. The aloe vera’s vibrant green contrasts beautifully with the muted tones of the pot and the surrounding décor, creating a warm and inviting atmosphere that’s both stylish and practical.
Incorporating Aloe Vera into Interior Design Styles
Aloe vera’s versatility means it can seamlessly integrate into various interior design styles. Its clean lines and simple elegance make it a perfect fit for minimalist, modern, and Scandinavian designs. Its natural earthiness complements bohemian, rustic, and farmhouse styles beautifully. Even in more eclectic settings, aloe vera provides a grounding element that balances bolder choices. Think of it as the chameleon of houseplants—adaptable and always stylish.
Three Pot Styles for Aloe Vera
The pot is key to showcasing your aloe vera’s beauty. Here are three styles that perfectly complement this stunning succulent.
Pot Style 1: Ceramic Planter
A simple, modern ceramic planter, around 6-8 inches in diameter, in a neutral color like white, grey, or beige, provides a clean and elegant backdrop for the aloe vera. The smooth surface of the ceramic contrasts nicely with the plant’s texture, and the size is ideal for a mature aloe vera plant. Choose a planter with drainage holes to prevent root rot.
Pot Style 2: Terracotta Pot
A terracotta pot, around 8-10 inches in diameter, adds a rustic charm. The porous nature of terracotta allows for good air circulation, which is beneficial for aloe vera. The earthy tones of the terracotta complement the plant’s natural green, creating a harmonious look. Consider a slightly larger pot to accommodate the aloe vera’s growth.
Pot Style 3: Galvanized Metal Pot
A galvanized metal pot, around 6-8 inches in diameter, offers a more industrial or farmhouse aesthetic. The metallic sheen adds a touch of modern edge, contrasting nicely with the plant’s organic form. Choose a pot with drainage holes to avoid waterlogging. The slightly distressed look of some galvanized pots adds a touch of vintage charm.
FAQ Section
Can I use tap water for my aloe vera?
It’s best to use filtered or distilled water, as tap water can contain minerals that may harm your plant.
How often should I repot my aloe vera?
Repot every 1-2 years, or when the roots become root-bound.
What should I do if my aloe vera leaves turn brown?
Brown leaves can indicate overwatering or sunburn. Adjust watering and light accordingly.
My aloe vera isn’t growing. What’s wrong?
Lack of sunlight, improper watering, or nutrient deficiency can stunt growth. Review care instructions.


